Showing posts with label tutorial. Show all posts

Tuesday, October 18, 2011

DIY Light Box

This light box has improved my photos and only cost me $5+ to make and about 15min of my time
Materials and tools needed 
1.A box (I buy 14x14x14 box at staples for around $3)
I have used smaller boxes but they do not work as well. I find this size is easy to use and works well.
2.Thin white tissue paper the kind used for gifts and packages( I buy mine at the dollar store $1)
3.Wide Packing Tape (I prefer clear packing tape but duct tape is good too, This can be purchased at the dollar store as well)
4.Poster boards for your background,not shown below(white, black or any color you like. White poster boards are 2 for $1 at the dollar store)
5.A utility knife 
6.scissors
7.pencil 
8.ruler or tape measure


 First make your box into a box if it is not already. Then using your utility knife cut "windows" on the top and two sides of your box like in the picture below. I like to cut the top flap from the front of the box so it does not get in the way while taking photos but I leave the other two so I can use them to block glare from other light sources if I need to.


Now measure and cut the tissue so that they will fit over each of your 3 "windows" and tape them into place. I cut extras and put them up so I can replace them quickly if I rip one. Time to cut your back drop. I cut one strip snug enough that it stays in place. If yours does not stay in place you can tape it in place. Try not to tape onto the tissue. There you go you have made a simple light box for around $5.

Time to use it! I normally have two lights one on each side but my second light needs a new bulb so just one from above for now:) I place the box side to the window on bright days and use daylight (my preferred light!) Use your camera setting to match the kind of light. Tungsten for most indoor light, or florescent  etc....


The results. No bad glare equal light and few shadows. When I use two lights, one on each side there is no real shadows. Play with the lights to get the lighting you need! Some times you might want shadow on one side.


Thursday, September 15, 2011

A few basics on listing product that I have learned the hard way!

I am in the process of re-doing old listing in my online shops. It is a lot of work correcting the mistakes of listing I did and have not updated since first starting to sell online over 3 years ago. Most of them I need to just start over from scratch. So I see a lot of product photos, and description writing in my future! lol. 

My current out look about product photos
As I look over my inventory to see if I have listed them I find the same few errors in the ones I started out with. The jewelry pieces are nice... why haven't they sold? Well part of the reason might be photo that aren't neat and clean looking. Even my worst photos are at least visually clear(no blurry photo from this shutter bug!) but I went from nature photography to small indoor product photos.... and had no clue of how different it would be. Over the years I have found a solid color back ground normally black or white works best to show off your product. I normally do not opt for using props other then maybe a jewelry stand or something that helps give the product life or shows some thing about the product.. but always keep it simple as to not distract customers from your product. Plus if your photos look to busy they might just pass it by. I started of by just putting material down as my back ground and snapping away with or without my tripod. Now I have a light box that I made( I should make a tutorial for it one of these days!) I always use my tripod and I have found paper makes the best back ground for me. I put a lot of thought into the placement of the product in each photos to make sure the potential customer can see it from every angle. I try to show details in close to show, texture, color, pattern, and design. At least one shot from a distance(not to far but enough to see it as a whole or in use). It does not have to be expensive a point and shoot camera will work fine, a small table top tripod is only about $10-15 and the DIY light box cost me under $5 to make. Get to know your photo editing software and your cameras setting. That about the short of it.

What does your product description say about you and your product?
This is an example of a listing I am editing right now

3 strand braclet. Rectangle tube gem stone beads,. black stone, chinh hai jade and black & green serpentine Copper bar slide clasp.

Wow how creative and discriptive was that?(note my sarcasm!) If my awful photos didn't deter them away then my utter lack of enthusiasm and details surely did, not to mention poor grammar and punctuation! No wonder this bracelet hasn't sold. I did not even have the size listed. Now the updated description...

Earthy rectangle tube serpentine, chinh hai jade and black stone make this 3 strand bracelet  the building block of a great ensemble. Adding to the natural earthy feel of this bracelet is the tiny copper leaf connectors holding it to the copper sliding bar clasp. Bracelet measures 8 inches long.

Things I have learned since I started. Give all the basic details in the beginning. If there is a story or some inspiration behind making it, add it in but after the basics. A lot people that buy hand made love to hear the who, what and hows of the piece they might buy but if they do not want to all that, the basics they need to know are right out in front. Always give the the size and dimensions, if they do not know if it with fit they will not buy it! Some might ask but chances are you just lost a sale. Give details of anything that touches the skin or can cause allergies(this comes from a personal experience I am allergic to many things so if I am unsure I do not buy it). Let costumers know if you offer something special like if you wrap it or package it special(offer pictures of it packaged as well if you can). Use key word( you can find extensive word list online) that attract buyers a few are unique, One of a kind, special, organic, natural etc but do not over do it and make sure it truly applies to your product. Do not list it as one of a kind if you have more very similar pieces. Be creative and let your own personal style shine through after all that is one of the best parts of buying and selling handmade!  

Monday, April 4, 2011

My Twisted Crochet Jewelry-Wire Crochet Part 1

Time needed 45min-1 ½ hours+
Skills need for this project             
Supplies needed
  • Size  E/4, 3.50mm(same size just depends where your from)
pic 1
Materials needed
  • 26 or 28 gauge wire(preferably on spool)
  • 16-24 inched worth of beads
  • clasp
pic 2
pic 3
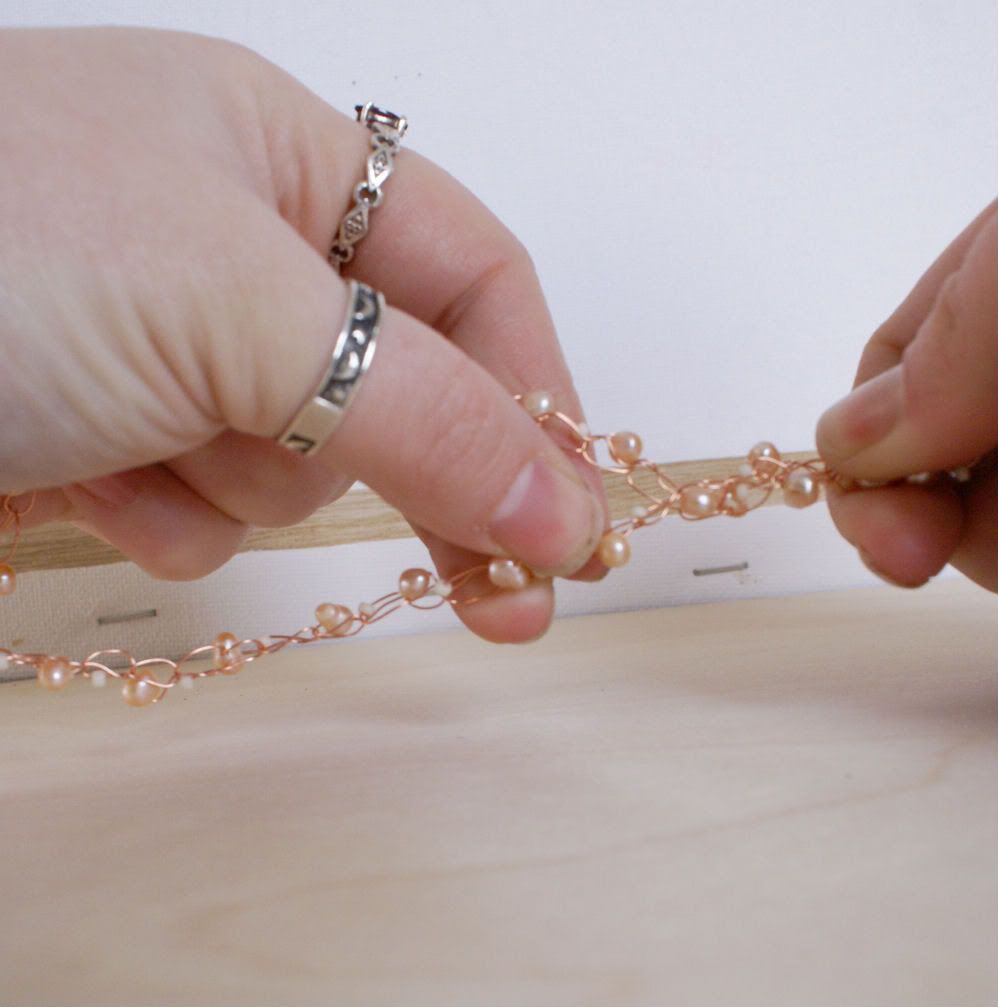
I have been working on wire crochet a lot lately and would like to share a project with you. Using wire is a bit trickier to get the hang of then yarn but technique is exactly the same. I have been making bracelets and necklaces by making a crochet chain and twisting it together. First pick your materials(pic 1), today I am using 26 gauge copper wire, 3-4mm light peach freshwater pearls, cream seed beads and a handmade copper hook clasp. How many beads depends on the size of the beads your using and the length of the jewelry piece, the size of your crochet hook and stitch so basically I use my best judgment. For necklaces I normally only fold the strand over once so I am only twisting 2 together but with bracelets I like to fold the chain twice giving me 3 to twist together. For this Necklace I stung on 16in worth of beads but it is better to have more then not enough.


pic 4
pic 5
Start by stringing your beads on the spool of wire(pic 2). Leaving an 6-8 in tail of wire make a small loop in your wire to start your crochet chain make one chain stitch, then grab a bead and put it snuggly up to your work(pic3) and make your next stitch. Continue this step until you reach your desired length, check your neck(for necklace) or wrist(for bracelet) to size it correctly. If you are planning on twisting 2 lengths together then make sure it wraps around twice, 3 lengths make sure it wraps around 3 times and so on. You do not even need to wrap it I have several necklaces that are just beaded crochet chain and I love them.  Now it is time to twist, twist, twist. Fold your length of chain equally for your project, since I am making a choker out of 2 strands I only fold it once and start lightly twisting it(pic 4). How much you twist it is up to you. Finally it is time to finish. Using the wire tail attach one side of your clasp by wrapping your wire around it(pic 5), then cut about 4in piece of wire(if you decide to do 3 strands and fold it twice you will have a tail at both ends and will not need to cut an extra piece of wire as long as you leave a tail at both ends) and wrap the other end of the clasp to the other end of the necklace. Trim and tuck the wires in so the do not snag or scratch. And your done.This easy style has so many options and can vary so much depending on wire, beads, size of hook, size of stitch, how many times you fold it and how much you twist  it. Have fun with it!
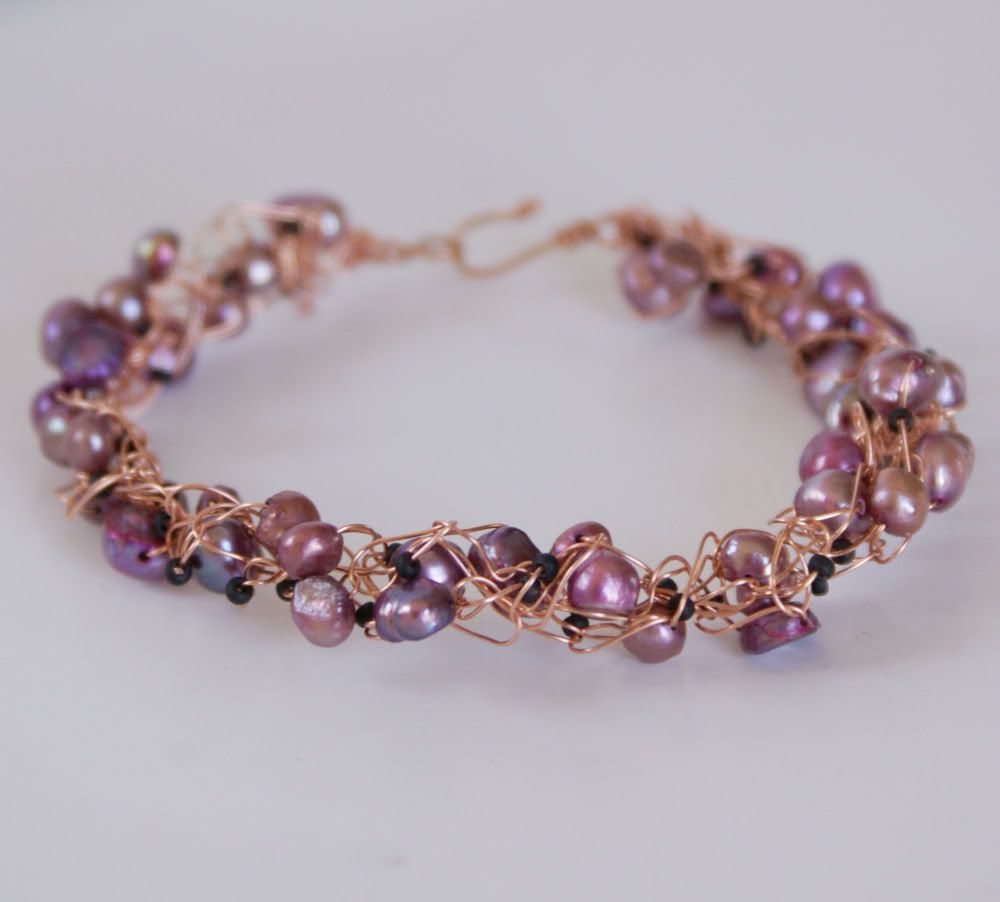
Custom order I made using this
technic, copper and freshwater pearls.
I made both this bracelet and a macthing
necklace for her wedding day! FUN


Finished project
Bracelet Made with garnet and copper
For sale in my shop
Necklace made with freshwater pearls and  copper
 for sale in my shops

Pin It

Related Posts Plugin for WordPress, Blogger...